Moving an established WordPress site to a new server always feels risky. Your site earns traffic, leads or sales every day, and even a short outage can affect revenue, trust and user experience. The good news is that you can migrate WordPress to Google Cloud with only a brief window of disruption when the move is planned correctly.
This guide walks through the process step by step, from preparing the new server to switching DNS at the right moment. Google Cloud can provide strong WordPress performance when the server, database, caching and website are configured correctly—but the migration itself is where most problems begin, so that is where we will focus.
Table of Contents
Quick Answer: How the Migration Works
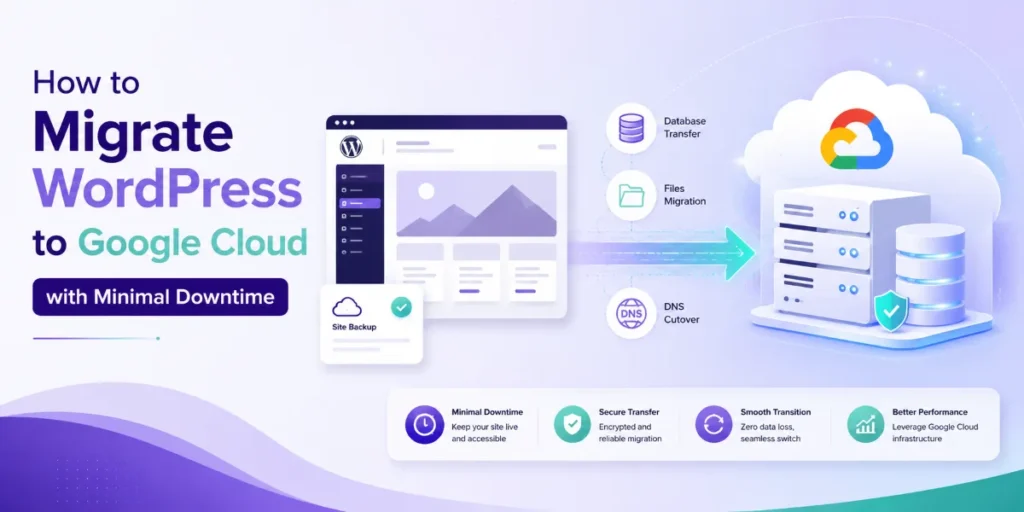
To migrate WordPress to Google Cloud with minimal downtime, prepare the new server first, copy and test the site privately, complete a final sync, then update DNS to the new static IP. Keep the old server active during propagation as a rollback option.
- Set up the Google Cloud server.
- Back up the existing site.
- Transfer files and the database.
- Configure WordPress on the new server.
- Test using your hosts file.
- Update DNS and monitor the cutover.
Why Migrate WordPress to Google Cloud?
Google Cloud runs on the same global infrastructure that supports Google’s own products. For WordPress owners, the practical benefits are control and flexibility.
You can choose the machine type, region, disk and network configuration, and adjust resources as your website’s needs change instead of relying only on fixed shared-hosting tiers.
It is important to understand what you are buying, though. Google Cloud provides infrastructure—the virtual machine, storage and network—not managed WordPress hosting.
Updates, backups, security and troubleshooting remain your responsibility, or that of a managed service provider.
Google Cloud may suit websites that have outgrown shared hosting, need a specific server region or require infrastructure that can be adjusted as traffic and resource demands grow.
For small websites that are already performing well on managed hosting, the additional technical responsibility may not be necessary.
What You Need Before You Start
A smooth migration depends on preparation more than technical skill.
Before touching anything, make sure you have:
- a Google Cloud account with billing enabled
- full access to your current hosting through cPanel, SFTP or SSH
- database access through phpMyAdmin or the command line
- access to your domain’s DNS management
- a recent, verified full backup stored somewhere other than the old server
- a low-traffic window planned for the final cutover
Also note your current WordPress version, PHP version, active plugins, total disk usage and database size.
Do not assume that simply using a newer PHP version will prevent migration problems. Record the current PHP version and confirm that the destination uses a supported version compatible with your theme, plugins and custom code.
Step 1: Set Up the New Server on Google Cloud
There are two common ways to create your WordPress server on Google Cloud, and both allow your existing site to remain online while you work.
Option A: Google Cloud Marketplace
Google Cloud Marketplace offers WordPress deployment options that can install WordPress, the web-server stack and a database on a single Compute Engine instance.
This route is faster for users who want a more guided setup, although it may offer less control over the exact server stack than a manual installation.
The cost generally comes from:
- the Compute Engine virtual machine
- persistent disk storage
- network usage
- external IP usage
- optional Google Cloud services
Check the specific Marketplace listing before deployment because some third-party images or software packages may have their own terms or additional fees.
Option B: Manual Setup on Compute Engine
For more control, create a Compute Engine virtual machine yourself and install your preferred stack, such as:
- Nginx or Apache
- PHP-FPM
- MySQL or MariaDB
- required PHP extensions
- caching tools
- monitoring and security software
Choose a region close to your primary audience where practical, because server proximity can affect response times for uncached requests.
Server location is only one part of performance. WordPress speed also depends on caching, database activity, theme quality, plugins, images and third-party scripts.
Whichever route you choose, reserve a static external IP address for the instance. You will point your domain to this IP later, and it should not change after cutover.
Step 2: Back Up Your Existing Site
Never migrate a live website without a verified backup.
A complete WordPress backup has two main parts:
- the website files
- the WordPress database
The files should include WordPress core, wp-content, themes, plugins, media uploads and wp-config.php for reference.
The database contains your posts, pages, settings, users, comments, orders and other dynamic content.
Create a compressed archive of the files using SSH or your hosting file manager. Export the database as an SQL file using phpMyAdmin or the command line.
Store both somewhere away from the old server, such as your local computer or separate cloud storage.
Then verify the backup. Open the archive, check that the expected folders are present and confirm that the SQL file is not empty or obviously incomplete.
A backup that has not been verified should not be treated as a reliable recovery plan.
Step 3: Transfer Files and Database
With the new server running and the backups ready, copy the site to Google Cloud.
Upload the file archive using SFTP or a direct server-to-server transfer over SSH. A direct transfer is often faster and more practical for large websites.
Extract the files into the correct web root. If you used a Marketplace deployment, confirm whether the fresh WordPress files should be replaced or merged with the migrated installation.
Next:
- Create a database on the new server.
- Create a database user.
- Assign the required permissions.
- Import the SQL file.
- Update
wp-config.phpwith the new database details. - Confirm the database table prefix.
- Check the import for errors.
If your domain is staying the same, you may not need to run a broad search-and-replace operation because only the server behind the domain is changing.
However, temporary URLs, staging addresses or environment-specific paths should still be reviewed.
When URL replacement is necessary, use a WordPress-aware search-and-replace tool. Basic text replacement inside raw SQL can damage serialized WordPress data.
Using a Migration Plugin
Migration plugins can package the files and database together, which may suit smaller websites and users who prefer not to work through SSH.
Before selecting a plugin, check:
- package-size limits
- PHP upload limits
- execution-time restrictions
- database size
- multisite support
- destination compatibility
- whether a paid extension is required
For larger websites or customised environments, a manual transfer may provide greater control and avoid plugin or server limits.
Step 4: Configure WordPress on the New Server
Before testing the migrated website, bring the new environment up to standard.
Check:
- file ownership and permissions
- PHP version
- required PHP extensions
- PHP memory limit
- upload limits
- database connectivity
- web-server configuration
- virtual host or server block settings
- WordPress permalink rules
- scheduled tasks
If the migration also changes the web server from Apache to Nginx, review custom rules carefully.
Apache commonly uses .htaccess for redirects, permalink rules and access restrictions. Nginx does not read .htaccess, so equivalent settings must be added to the Nginx server configuration.
Review any custom:
- redirects
- cache rules
- security rules
- blocked paths
- headers
- upload restrictions
- WordPress multisite settings
Prepare SSL
This is also the right time to plan SSL.
You can issue a certificate before cutover using an appropriate validation method or immediately after the domain points to the new server.
Do not leave SSL planning until after launch. A site that moves without a valid certificate may display browser warnings or experience redirect and mixed-content issues.
Step 5: Test Privately Using Your Hosts File
Private testing is one of the most important parts of a minimal-downtime migration.
Edit the hosts file on your computer and map the domain to the new server’s static IP. Your browser will load the site from Google Cloud, while ordinary visitors continue reaching the original host.
This allows you to test the new environment as if it were already live without changing public DNS.
Work through the website methodically.
Check:
- homepage
- important landing pages
- blog posts
- menus
- internal links
- contact forms
- WordPress admin
- media files
- media uploads
- mobile layout
- scheduled tasks
- third-party integrations
For WooCommerce websites, also test:
- product pages
- cart
- checkout
- customer accounts
- payment gateways
- transactional emails
- stock updates
- order-status changes
- webhooks
Fix problems while the public site remains untouched. Do not proceed simply because the homepage loads correctly.
Forms, email delivery, scheduled tasks, payments and other dynamic features may still have problems.
Step 6: Lower TTL and Complete the DNS Cutover
DNS is where migration downtime is often reduced or extended.
Every DNS record has a TTL, or time to live, which tells resolvers how long they may cache it.
If the TTL is high, some visitors may continue reaching the old server for longer after the IP address changes.
Where possible, lower the TTL on the domain’s A record before migration day. For example, a value such as 300 seconds may encourage many resolvers to refresh the record sooner.
Make the change in advance. Lowering the TTL immediately before the cutover may not affect records that have already been cached using the previous value.
Complete the Final Sync
While the new server is being tested, the original website may continue receiving:
- content changes
- form submissions
- comments
- registrations
- uploaded files
- WooCommerce orders
Perform a final sync shortly before updating DNS.
For low-activity sites, this may involve copying recent uploads and importing a fresh database.
For active websites, temporarily limiting content changes, orders or registrations during the final synchronisation can reduce the risk of data being written only to the old server.
Update the DNS Record
At the planned cutover time:
- Confirm the new static IP address.
- Review the existing DNS zone.
- Update the website’s A record.
- Preserve unrelated email and verification records.
- Keep the old server active.
- Monitor both environments during propagation.
Do not remove MX, SPF, DKIM or DMARC records unless you are intentionally changing the email service.
With a lower TTL, many visitors may reach the new server within a relatively short period, but some resolvers may take longer. Propagation times vary between networks.
Keep the old server running for a few days as a safety net. Once traffic has fully shifted and the new environment is stable, you can consider cancelling the old hosting.
After the migration is complete, raise the TTL to an appropriate normal value.
This process aims for minimal downtime, not guaranteed zero downtime.
Post-Migration Checks and Optimisation
Once DNS has propagated, run another complete round of checks on the live website.
Verify:
- SSL certificate validity
- HTTP-to-HTTPS redirects
wwwand non-wwwbehaviour- contact forms
- email delivery
- cron jobs
- scheduled posts
- WordPress login
- analytics tracking
- Search Console
- XML sitemap
- robots.txt
- important redirects
- backup jobs
Set up a backup routine on the new server. Google Cloud does not automatically provide a complete WordPress backup and recovery process unless you configure snapshots, backups or another suitable solution.
Performance validation should begin before cutover and continue after migration.
The move provides an opportunity to review:
- page caching
- object caching
- database performance
- image optimisation
- theme quality
- plugin behaviour
- third-party scripts
- CDN configuration
A larger virtual machine alone does not guarantee a faster website. Performance depends on the complete server and WordPress configuration.
How Much Does the Migration Cost?
Migration costs fall into three separate areas.
Infrastructure Cost
This is the ongoing Google Cloud bill and may include:
- Compute Engine usage
- persistent disk storage
- snapshots
- external IP usage
- network egress
- CDN
- monitoring
- optional database services
WordPress Management Cost
This may include:
- WordPress updates
- security
- backups
- monitoring
- troubleshooting
- performance optimisation
One-Time Migration Cost
This may include:
- migration-plugin licences
- server configuration
- professional migration services
- DNS setup
- SSL setup
- post-migration testing
Pricing varies by region, machine type, storage, network usage and optional services.
Confirm current costs using the official Google Cloud pricing calculator before deployment. Do not estimate the total cost using only the virtual-machine price.
Common Migration Mistakes to Avoid
Most migration problems come from a small number of avoidable errors.
Common mistakes include:
- skipping private hosts-file testing
- lowering DNS TTL too late
- using an incompatible PHP version
- forgetting custom Apache or Nginx rules
- failing to configure SSL
- changing unrelated DNS records
- forgetting to test email delivery
- cancelling the old hosting too early
- assuming Google Cloud automatically handles WordPress backups
None of these problems is especially difficult to prevent. They mainly require completing the steps in the correct order and avoiding a rushed cutover.
How WPLogica Helps
If you would rather not manage the technical side yourself, WPLogica supports businesses with WordPress migration, Google Cloud server setup, security, performance optimization, and ongoing maintenance.
Support can include:
- Google Compute Engine provisioning
- WordPress file and database migration
- compatibility checks
- DNS and SSL configuration
- private pre-launch testing
- controlled cutover planning
- rollback preparation
- post-migration monitoring
Learn more about running your website on this platform through WPLogica’s WordPress hosting on Google Cloud services.
Frequently Asked Questions
How long does it take to migrate WordPress to Google Cloud?
The time varies according to website size, database size, media files, server configuration and testing requirements.
A small standard website may require only a few hours of hands-on work, while larger or customised websites can take considerably longer. DNS propagation also varies between networks.
Will my site go down during the migration?
Brief disruption is possible during DNS propagation or the final synchronization.
Preparing and fully testing the new server before changing DNS can reduce downtime, but complete zero downtime cannot be guaranteed for every standard single-server migration.
Do I need to change my domain or URLs?
No. If you keep the same domain, the main change is normally the DNS A record pointing to the new Google Cloud IP address.
Your URLs and permalinks can remain the same. After migration, check redirects, canonical tags and internal links to confirm nothing changed unexpectedly.
Does Google Cloud manage WordPress updates and backups?
No. Google Cloud provides the infrastructure.
WordPress core, plugin and theme updates, security, backups and monitoring remain your responsibility unless they are handled by a managed service provider.
Can I use a migration plugin instead of a manual transfer?
Yes. Migration plugins can work well for many smaller and standard WordPress websites.
Large databases, multisite installations, customised server environments and highly active websites may require a manual or professionally managed migration.
What server size do I need on Google Cloud?
It depends on traffic, plugin activity, database load, memory usage, caching and the number of logged-in users.
Start with a configuration based on measurable requirements and review monitoring data after launch.
Compute Engine resources can be changed later, although resizing may require a planned restart and compatibility checks.
Is Google Cloud suitable for a small WordPress website?
Yes, but it may introduce more technical management than a small website requires.
Compare the complete infrastructure, backup, security and maintenance costs with a conventional managed WordPress hosting plan before migrating.
Will migrating to Google Cloud make my website faster?
It can improve performance when the new server and WordPress installation are configured correctly.
However, speed depends on caching, database tuning, theme quality, plugins, images and third-party scripts. Migration is only the starting point; optimisation determines the final result.
Final Verdict
Migrating WordPress to Google Cloud can be worthwhile for websites that need more infrastructure control, a specific server region or resources that can be adjusted as requirements grow.
However, Google Cloud provides infrastructure rather than complete WordPress management. Updates, security, backups, monitoring and optimisation still need to be handled.
The migration itself is manageable when you follow a build-first, test-privately and cut-over-last approach.
The safest process is to prepare the new environment, create and verify a complete backup, transfer the site, test it privately, complete a final sync and change DNS only after the destination has been validated.
For simple websites performing well on managed hosting, the additional responsibility may not be justified. For growing or technically demanding websites, a carefully managed Google Cloud migration can provide a flexible foundation while keeping disruption and risk under control.